Cisco FTDv in Cisco VIRL
Cisco is actively pushing their Firepower Threat Defense software with the new Firepower 2100 units on their way this summer in effort to eventually replace the ASA5525-X, ASA5545-X and ASA5555-X platforms. When using FTD you must also have the Firepower Management Center (FMC) available to manage and configure these devices. This gets difficult especially if you want to test things out because not everyone has Cisco Firepower lying around unused. How are you supposed to test and learn the depths of this product? (Hint: Cisco VIRL)
Note: There is a catch to this, as of this post Cisco does not included the FMC or FTDv images with Cisco VIRL by itself. You’ll have to be with a company or organization that has already purchased this product. Keep in mind during the initial configuration of FMC there will be a spot to install some licensing but you can skip this step as it's not required to get to the initial login screen. The images I’m working with in this post are the following:
- FMC: 6.2.0.2 (updated from 6.2.0)
- FTDv: 6.2.0
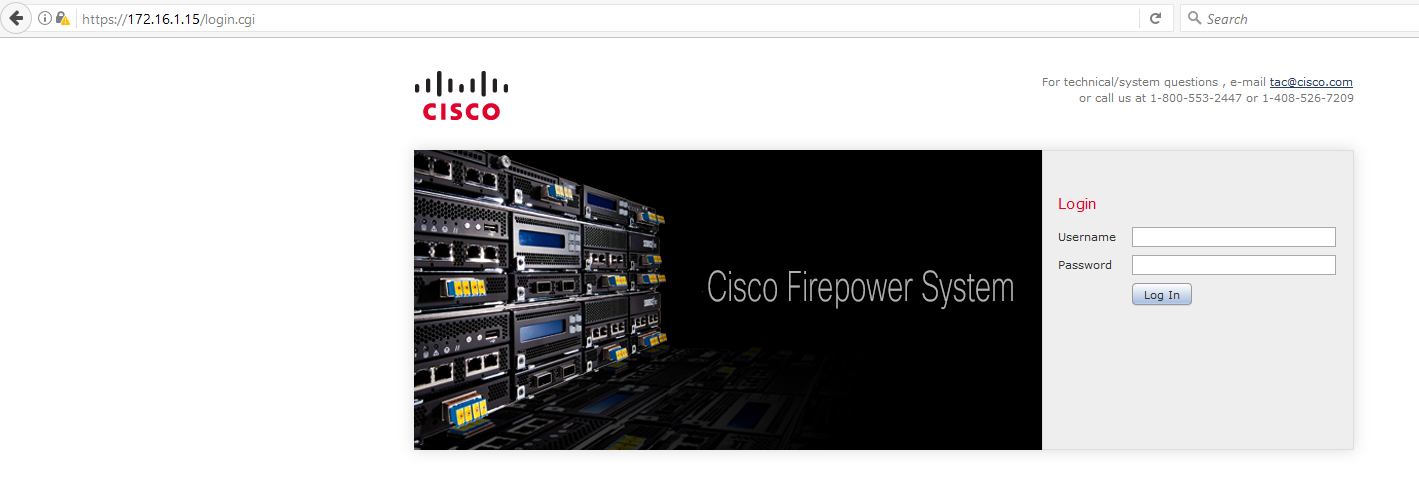
To understand how this is works, you must setup the FMC as a separate virtual machine in VMware Workstation and configure a static IP address for the FMC. You’ll want to use an IP address that is in VIRL’s shared flat network. This is usually the 172.16.1.0/24 network. In this example, I configured the FMC with the IP address of 172.16.1.15. If you have installed VIRL in VMware Workstation and followed the VIRL installation guide you’ll want to put the FMC in VMnet 1. Basically, you’ll want the FMC and FTDv to be on the same broadcast domain in the management network within VIRL for your FMC to be able to manage the FTDv image. If you are using VIRL on a bare metal server and have VMware Workstation installed on a different system use VIRL’s OpenVPN connection settings. To understand how this works you can reference the following video (Credit goes to Cisco VIRL Youtube Channel):
Once your computer has the OpenVPN client installed and you can successfully connect to VIRL, you also can map VMware Workstation to the OpenVPN network adapter under the virtual network editor.
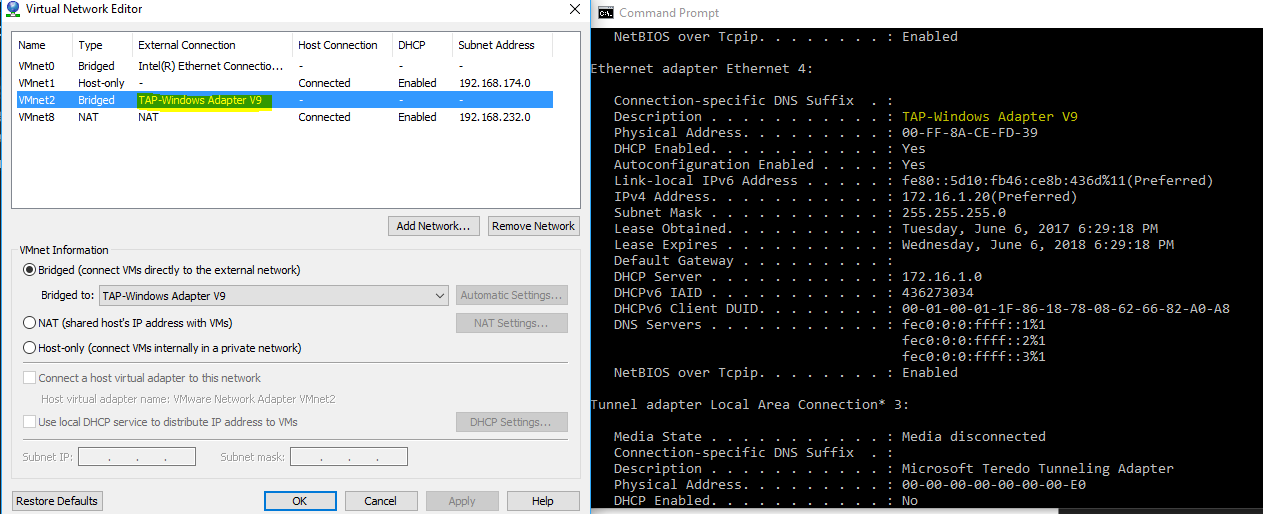
This gives your FMC direct access to VIRL’s shared flat network while using the OpenVPN client. Please reference the Cisco Firepower Management Center Virtual for VMware Deployment Quick Start Guide
The process in pretty simple login into the FMC CLI and run the following command and follow the prompts.
1sudo /usr/local/sf/bin/configure-network
If all is well you should see the initial configuration wizard, and once you have completed the initial setup wizard you should be able to login using the password you recently created.
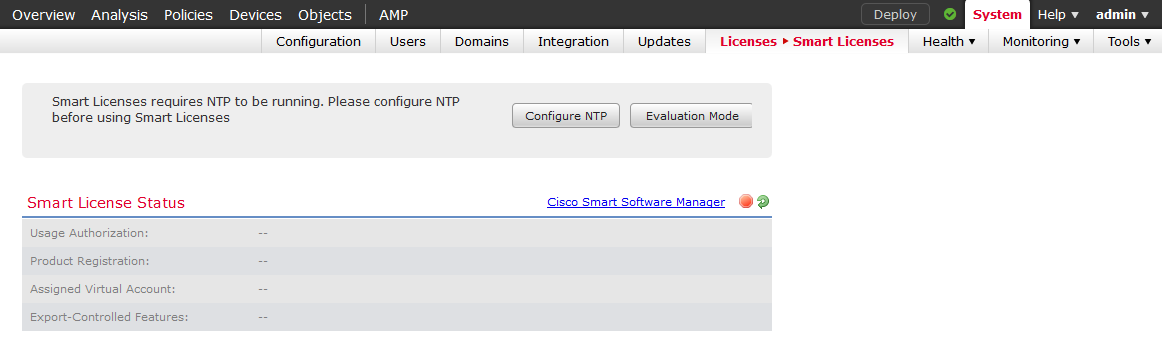
You now have a FMC ready and primed to manage FTDv devices, like I mention earlier you can enable the evaluation license which is only available in the 6.2.0 or higher releases. Go to System->Licenses->Smart Licenses which gives you 90 days to kick in the tires.
Note: You also could use VMware snapshots to set up a vanilla FMC with no devices, and no evaluation license enabled, that way you could always revert to that FMC you originally started with, also helps if you really got carried away :)
We now need a FTDv image to install within VIRL. When you look at Cisco's support download page you'll want to use the QEMU format (qcow2) if you are importing this into Cisco VIRL. A couple of house keeping items first before we can import this:
-
First: Create a flavor to specify run time parameters in VIRL, you can find this under Node Resources->Flavors. FTDv requires 8GB of RAM, 4 virtual CPU cores and 4 interfaces to run, this includes the Management and Diagnostic ports that VIRL puts in automatically. You can also leave disk space at 0
-
Second: Create a copy of the ASAv subtype, under Node Resources->Subtypes, find the ASAv subtype and click on the “stethoscope” icon also called specialize and fill in the following:
-
Name of plugin - FTDv
-
Description of plugin - Firepower Threat Defense
-
Name of management interface - Management0/0
-
Names of dummy interfaces - Diagnostic0/0
-
Pattern for data interface names - GigabitEthernet0/{0}
-
First data interface number - 0
-
Max count of data interfaces - 10
-
Number of interfaces per LC - 0
-
Number of serial interfaces - 1
-
Protocol for network CLI - telnet
-
Make VNC access available - True
-
Name of icon for GUI - asav
-
Show subtype on GUI palette - True
-
Configuration disk type - cdrom
-
ISO 9660 level in cdrom disk - 4
-
Name of file for config drive - /day0-config
-
Virtual interface model - virtio
-
Main disk bus model - virtio
-
RAM (MB) allocated per node - 8192
-
Number of CPUs allocated per node - 4
-
Require HW acceleration in kvm - True
-
Name of default image - FTDv
Third: Import the image, Node Resources->Images->Add:
- Find and select the FTDv Subtype
- Name/Version – 6.2 (I just picked the main version)
- Release - 6.2.0
- Source – File on server
- Image path – /home/virl/VMs/image of FTDv image
Save the image. We are almost there!
To review we have a FMC ready, we have the evaluation license enabled so that we can manage FTDv devices and this FMC is statically configured to use an IP address that is in VIRL's shared flat network. We just went over the settings required to get the FTDv to boot up in Cisco VIRL.
So what's next? Well if you wanted to register and configure the FTDv manually you are all set to go just start-up the device and you can walk through the initial prompts to get it registered to the FMC and start deploying your configurations. However one the neat features that VIRL offers is pre-configuration of the device while the device starts up, also called Day0 configuration. That way you can to skip all of those initial prompts and just register the device from FMC when the FTDv image is fully booted. To do that you will be using the AutoNetKit in VM Maestro, use the following Day0 configuration before starting your FTDv image.
 1{
 2"EULA": "accept",
 3"Hostname": "ftdv-VIRL",
 4"AdminPassword": "Admin123",
 5"FirewallMode": "routed",
 6"DNS1": "none",
 7"DNS2": "none",
 8"DNS3": "none",
 9"IPv4Mode": "dhcp",
10"IPv4Addr": "",
11"IPv4Mask": "",
12"IPv4Gw": "",
13"IPv6Mode": "disabled",
14"IPv6Addr": "",
15"IPv6Mask": "",
16"IPv6Gw": "",
17"FmcIp": "172.16.1.15",
18"FmcRegKey": "cisco1234",
19"FmcNatId": ""
20}
The fields are pretty self-explanatory the only thing that could be different is if you used a different FMC IP and registration key. When the image boots it will grab an IP address from VIRL's shared network and already be pending a registration. The only thing you have to do is register your device from FMC and deploy your configuration. This now makes it pretty easy and quickly to test deployments and configuration within VIRL. In my testing it took about 15 to 20 minutes for the FTDv device to become online and to be registered within FMC. That's all I got for now like always I hope this information helpful as alawys!
Static Comments:
Shaun -
Figured it out, just needed to select the topology management network to be in the Shared Flat network. This has helped me out tremendously, thank you.
Shaun -
How and which interface did you use to get the FTDv working on the FLAT network? Can you show a working sample topology you used?
Many thanks for the tutorial - when I follow this I consistently get the same issue: Virtual FTD requires at least 4 network interfaces to complete system initialization. System initialization in progress. Please stand by. The bar turns but will sit there indefinitely. Any ideas?
Ryan -
Hey Karmicgeezer, That is expected. You can't just run the VM without it connected to anything in VIRL. Make sure your subtype in VIRL has a management and diagnostic interface. You also have to connect up to two interfaces on the FTDv in VIRL in order for it to start correctly. Hope that Helps, Ryan
Ryan, Fantastic, this would explain why it works natively in ESXi but not deployed in VIRL without sufficient interfaces. Much appreciated!! All the best, Andy
Ryan -
Glad I could help Andy! Ryan