Cisco VIRL and Windows VMs

One of the neat features of Cisco VIRL is it runs on an open platform, with OpenStack as the orchestration program running on top of an Ubuntu operating system. This gives VIRL additional flexibly by being able to run third-party VMs with KVM begin the hypervisor. In this guide I’ll walk through some of the steps I took to get Windows XP up and running in VIRL. :) If you have a more recent version of Windows that's in the current decade following this guide is pretty much the same just adjust the disk space and RAM to fit the requirements. I picked Windows XP is because its light weight, and with an average RAM usage under 100MB it makes easy to add multiple instances if you needed all without wasting too much resources on VIRL host. To get started:
- You’ll need to have a copy of Windows XP.
- I also found an unofficial service pack for Windows XP SP4 (unofficial) - Optional
- Copy of the Windows Virtio Drivers from Fedora. (VFD Floppy image when installing Windows XP on KVM)
I’m running Cisco VIRL 1.2.83 on bare metal for this example, but this would also work if VIRL is virtualized. Let’s first edit the nova.conf file in VIRL, we need change a value in the nova configuration file which helps us control the mouse better when we use VNC to view the virtual machine in VIRL.
1nano /etc/nova/nova.conf
Find use_usb_tablet = False and change it to use_usb_tablet = True save the changes, and restart VIRL.
Once VIRL comes back up we now need to create folder under the home/virl directory to store our Windows XP installation, drivers and the virtual machine, I’m calling it VMs in this example. Once the folder is created move into that folder using terminal and type the following:
1sudo qemu-img create -f qcow2 wsxp-SP3.qcow2 15G
This will create a virtual disk in qcow2 format and the size will be 15G, this next command will create all the necessary settings needed to start the installation of Windows.
1sudo virt-install --connect qemu:///system --name wsxp-SP3 --ram 512 --vcpus 1 --network network=default,model=virtio --disk path=/home/virl/VMs/wsxp-SP3.qcow2,format=qcow2,device=disk,bus=virtio --cdrom /home/virl/VMs/xp.iso --disk path=/home/virl/VMs/virtio-win.vfd,device=floppy --vnc --os-type windows --os-variant winxp
Please make sure to verify the paths are correct per your system. I’m mounting the XP installation ISO as well as the floppy disk so that I can install the drivers needed for Windows to recognize the hard drive. Open virt-manager to see your Windows XP virtual machine it should already be on so you will want to walk through the steps to complete the installation.
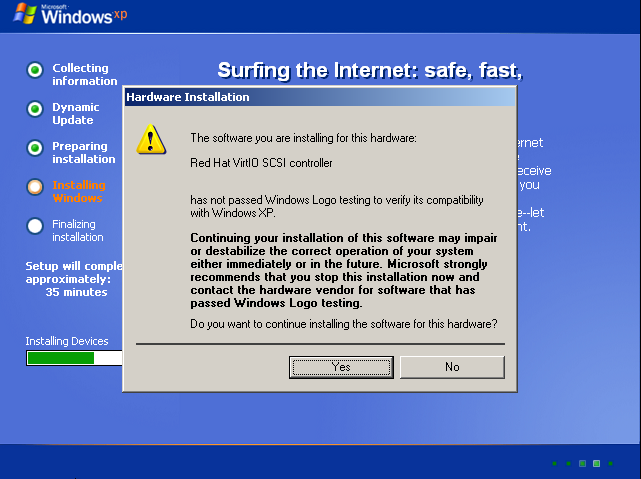
During the installation and when installing drivers, you will get a couple of warnings about how the software drivers have not passed logo testing ignore this and continue to install it.
Once you have Windows installed you can mount your virtio drivers that you downloaded and install the remaining drivers needed for Windows XP as well as any programs you would like to have available when you spin up this VM. Wireshark (Version 1.10.14), and 3cdaemon are just a couple of examples for software you could use.
Once you have all the programs you want to go ahead and prepare a sysprep image using your XP installation ISO file. Open the deploy.cab file which is under the SUPPORT\TOOLS folder, copy it into a new directory called SYSPREP on the C drive and extract the cabinet file. Once these files have been copied, turn off the VM and clone it. That way if you need to make any changes to the VM you can use your original VM. Once the machine turns off after the sysprep you now have an image you can import into VIRL. For reference on how to Sysprep Windows XP I followed this guide: http://www.petenetlive.com/KB/Article/0000599
You’ll want to use that cloned image when you import this into VIRL because it will be a “new” machine every time it is launched from VIRL including the hostname if you configured the sysprep.Inf file correctly. The finished product should be something like what I have below, you shouldn’t have to do anything but wait a couple of minutes for an XP VM and if you configured DHCP on your routers in VIRL your machine will get an IP address automatically.
To import this VM into VIRL go into the User Workspace Management within in VIRL. We are going to create copy of a subtype. Under Node Resources->Subtypes, find the generic subtype and click on the "stethoscope" icon also called specialize and fill in the following:
- Subtype - Windows
- Desciption of plugin - VM of Windows
- Pattern for data interface names - eth{0}
- First data interface number - 0
- Max count of data interfaces - 5
- Number of interface per LC - 0
- Number of serial interfaces - 0
- Protocol for network CLI - none
- Make VNC access available - (Checked)
- Name of icon for GUI - unknow
- Show subtype on GUI palette (unchecked)
- Configuration disk type - disk
- ISO 9660 level in cdrom disk - 2
- Virtual interface model - virtio
- Main disk bus model - ide
- RAM (MB) allocter per node - 512
- Number of CPUs allocated per node - 1
- Name of default image - Windows-XPSP3
Create the subtype. Once the subtype is created go to Node Resources->Images->Add:
- Find and select the Windows Subtype
- Release - 5.1 (I just picked the Windows NT version)
- Source - File on server
- Image path - /home/virl/VMs/image of xp clone
Create the image. Once the image has been created you now have imported Windows XP within VIRL and should be able to launch it within VM Maestro. You can take similar steps and import additional VMs like Juniper, Palo Alto, and Fortinet are just some examples more information how to import those and other are on 3rd Party VMs in VIRL page on the Cisco Learning Network. I hope this information is helpful, Ryan.
Static Comments:
Configuring EIGRP – Named Mode – Cisco Skills -
[…] That’s all I got for now for a basic configuration of EIGRP name mode and I hope this helpful. If you are using Cisco VIRL you can find the project I was referencing using this link Github. There is a subtype that is added in this configuration which was the Windows XP image I was working with. You can find more information about import Windows VMs and other 3rd Party systems into VIRL by checking out a previous post: Cisco VIRL and Windows VMs […]
ASA Site to Site VPN (DHCP) – Cisco Skills -
[…] There is a subtype that is added in this configuration which was the Windows XP image I was working with. You can find more information about import Windows VMs and other 3rd Party systems into VIRL by checking out a previous post: Cisco VIRL and Windows VMs […]