Install RSYSLOG & LogAnalyzer on CentOS 6-5

I am looking at rsyslog which is fast syslog system and Loganalyzer as an upfront web GUI for those logs. The Loganalyzer application offers searching of various syslogs, all of which is open source and available to download. In this guide I will go through the steps to get these two applications to work together and in the end of this tutorial we should have a working syslog system ready to take logs! The operating system I am using is the latest CentOS 6.5 minimal. Let's get started.
Using VMware Workstation the first thing I have done is installed a minimal version of CentOS on the VM. The VM has 30GB on the disk with one processor and two cores with 2GB of RAM. (Which took about 10 minutes to install) Once the VM rebooted I login into the root account and ran the command yum update and accepted all the updates the operating system was able to find (Which took about 10 minutes) Let’s first added some housekeeping packages like wget and nano yum install wget nano .The minimal install does not include wget, or nano. Nano is a good text editor for people who don’t want to use VI :) I have also disabled iptables (service iptables stop & chkconfig iptables off ) in this demo but this is not recommend in a production environment.
FIRST:
Let’s install apache:
1yum install httpd
Start the Service:
1service httpd start
Let’s make sure the service automatically when the server reboots:
1chkconfig httpd on
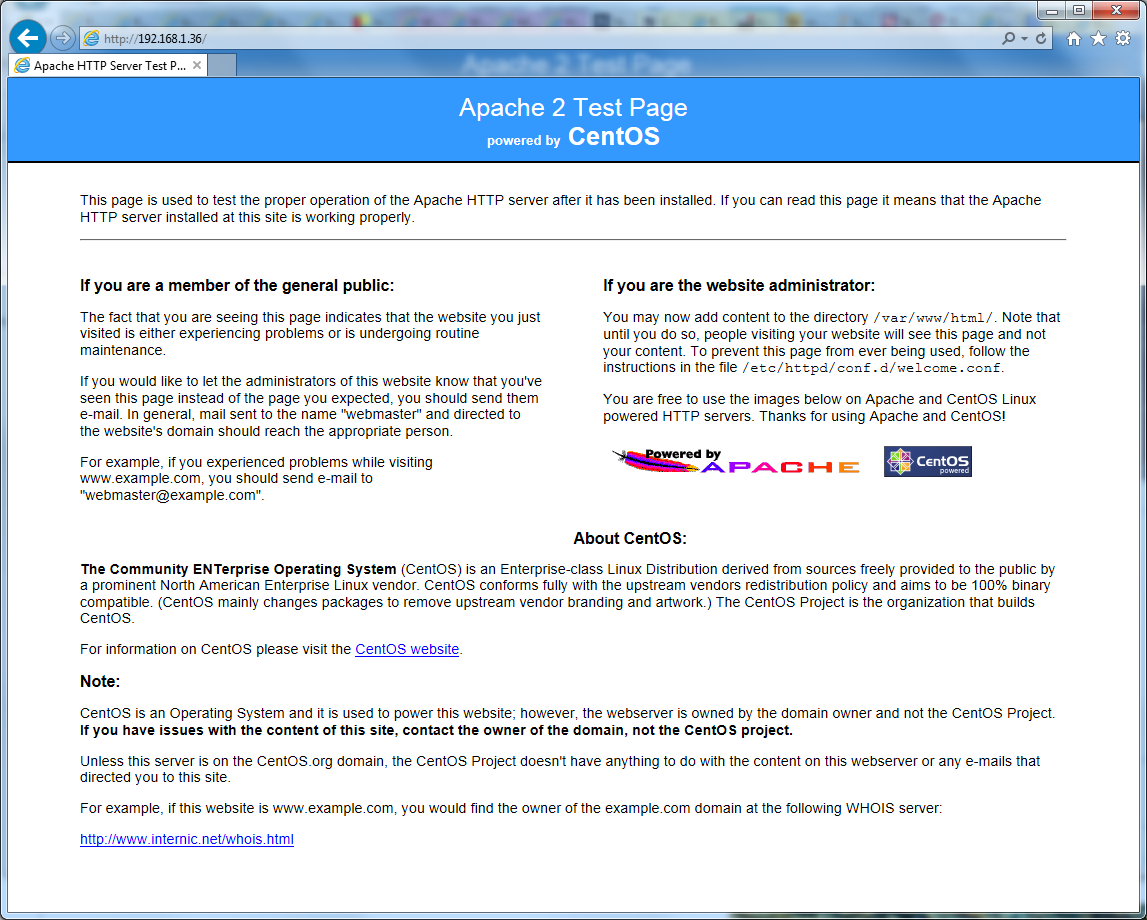
Let’s test to make sure you can get to the sample webpage, http://your-server-ip-address if it is working should look something like this.
SECOND:
Install MySQL:
1yum install mysql mysql-server
After install is finished start it up:
1service mysqld start
Like apache, let’s make sure this service starts when the server reboots:
1chkconfig mysqld on
For security change the MySQL Admin password:
1mysqladmin -u root password 'YourNewPassword'
Let’s Test MySQL, by logging into the database:
1mysql -u root -p
Did you get something like below?
 1Welcome to the MySQL monitor. Commands end with ; or \g.
 2Your MySQL connection id is 4
 3Server version: 5.1.73 Source distribution
 4
 5Copyright (c) 2000, 2013, Oracle and/or its affiliates. All rights reserved.
 6
 7Oracle is a registered trademark of Oracle Corporation and/or its
 8affiliates. Other names may be trademarks of their respective
 9owners.
10
11Type 'help;' or '\h' for help. Type '\c' to clear the current input statement.
12
13mysql>
THRID:
Install PHP,
1yum install php php-mysql php-gd
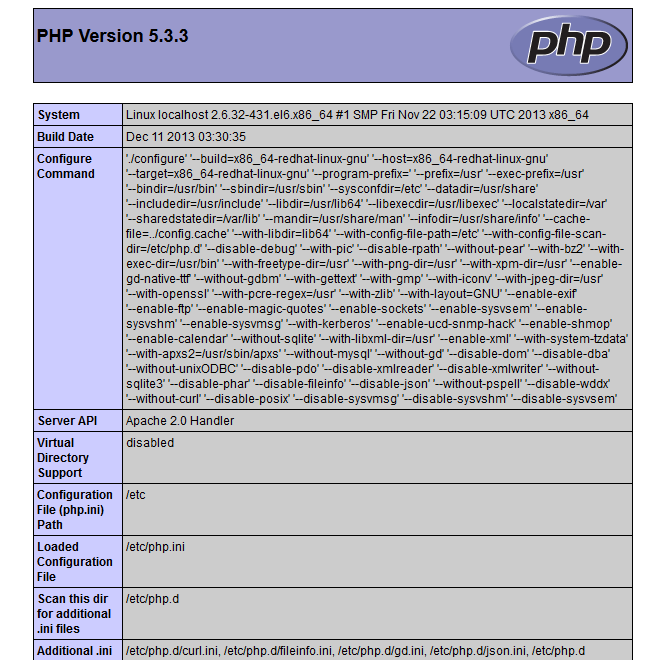
Once finished installing create a phpinfo page.
1nano /var/www/html/test.php
Type the following and save the test.php
1<?php
2phpinfo();
3?>
Restart the Apache Service
1service httpd restart
Open up your browser and type http://your-server-ip-address/test.php You should get something like below.
FOURTH:
Install Rsyslog, A couple things first, CentOS uses an older version of rsyslog, so why not use the latest stable version of rsyslog.
1wget http://rpms.adiscon.com/v8-stable/rsyslog.repo
2mv rsyslog.repo /etc/yum.repos.d/rsyslog.repo
3yum install rsyslog\* --skip-broken
When the server reboots let’s start this service automatically.
1chkconfig rsyslog on
Rsyslog has a createDB script in the following location: /usr/share/doc/rsyslog-mysql-8.2.1/createDB.sql, you can leave this alone or you can optionally change the database name. (Don’t be boring) In this example I changed it to rsyslogdb (… still a little boring)
1nano /usr/share/doc/rsyslog-mysql-8.2.1/createDB.sql
2CREATE DATABASE rsyslogdb;
3USE rsyslogdb;
4CREATE TABLE SystemEvents
5[...]
Let’s create the rsyslogdb database:
1mysql -u root -p < /usr/share/doc/rsyslog-mysql-8.2.1/createDB.sql
Should be able to access the database:
1mysql -u root -p rsyslogdb
For security add a dedicated administrator called rsyslogdbadm for only this database with a password of what you want.
1GRANT ALL ON rsyslogdb.* TO rsyslogdbadmin@localhost IDENTIFIED BY 'NewPasswordHere';
2FLUSH PRIVILEGES;
3exit
Did it all work? Let’s test logging in and exit mysql.
1mysql -u rsyslogdbadmin -p rsyslogdb\
Uncomment the following modules in the rsyslog.conf (Located in /etc/rsyslog.conf) file and add the MySQL module line.
 1# Provides UDP syslog reception
 2# for parameters see http://www.rsyslog.com/doc/imudp.html
 3module(load="imudp") # needs to be done just once
 4input(type="imudp" port="514")
 5
 6# Provides TCP syslog reception
 7# for parameters see http://www.rsyslog.com/doc/imtcp.html
 8module(load="imtcp") # needs to be done just once
 9input(type="imtcp" port="514")
10
11# Load the MySQL Module
12module(load="ommysql")
You may also want to edit the Rules section to disable logging to the console, in this example I said log only syslogs that have a level of emergency to the console.
1#### RULES ####
2
3# Log all kernel messages to the console.
4# Logging much else clutters up the screen.
5*.emerg*
Also note that rsyslog logs everything it sees to a log folder by default as well. If you are using LogAnalyzer to view logs like in our example we are storing those logs in a MySQL database as well. Depending on how much logging you have you may either want to disable this and have LogAnalyzer do it all or setup a cron job to drop these once in a while.
 1# Log anything (except mail) of level info or higher.
 2# Don't log private authentication messages!
 3*.info;mail.none;authpriv.none;cron.none /var/log/messages
 4
 5# The authpriv file has restricted access.
 6authpriv.* /var/log/secure
 7
 8# Log all the mail messages in one place.
 9mail.* -/var/log/maillog
10# Log cron stuff
11cron.* /var/log/cron
12
13# Everybody gets emergency messages
14*.emerg *
15
16# Save news errors of level crit and higher in a special file.
17uucp,news.crit /var/log/spooler
18
19# Save boot messages also to boot.log
20local7.* /var/log/boot.log
In the forwarding rule add the following, this tells rsyslog to send all syslogs to the MySQL database.
1# ### begin forwarding rule ###
2# Let's forward all logs to the MySQL Database
3*.* :ommysql:127.0.0.1,rsyslogdb,rsyslogdbadmin,YourPassword
4…
Save and exit the configuration file and restart the Rsyslog service to load the new configuration.
1service rsyslog restart
You should now have some logs in MySQL Database, check it by using the following:
1mysql -u rsyslogdbadmin -p rsyslogdb
2
3mysql> select count(*) from SystemEvents;
4+----------+
5| count(*) |
6+----------+
7|        2 |
8+----------+
FIFTH:
Download the LogAnalyzer web application,
1wget http://download.adiscon.com/loganalyzer/loganalyzer-3.6.5.tar.gz
Unpack the tarball:
1tar zxvf loganalyzer-3.6.5.tar.gz
Copy the install files into Apache.
1cp -r loganalyzer-3.6.5/src/ /var/www/html/loganalyzer
2cp -r loganalyzer-3.6.5/contrib/\* /var/www/html/loganalyzer/
Let’s go into those folders:
1cd /var/www/html/loganalyzer/
Add some execution permission to these files:
1chmod +x configure.sh secure.sh
Run the ./configure.sh, which will create a blank config.php file as well as set write access.
1[root@localhost \]# ./configure.sh
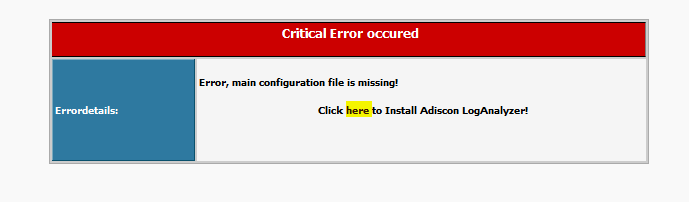
To complete the install of LogAnalyzer we have to following the prompts on the web. Browse to http://your-server-ip-address/loganalyzer You should get an error page like below. Select the here link to start the install.
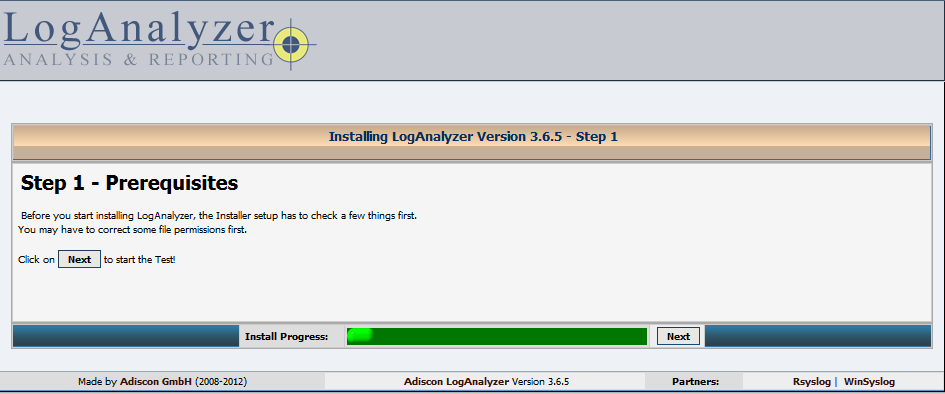
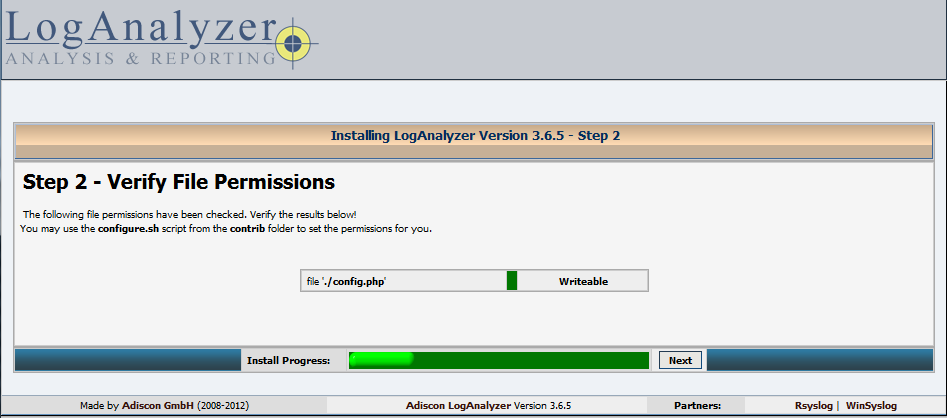
- Loganalyzer will do a couple of tests to verify configuration click next to start them.
- Select Next if the config.php file can be written.
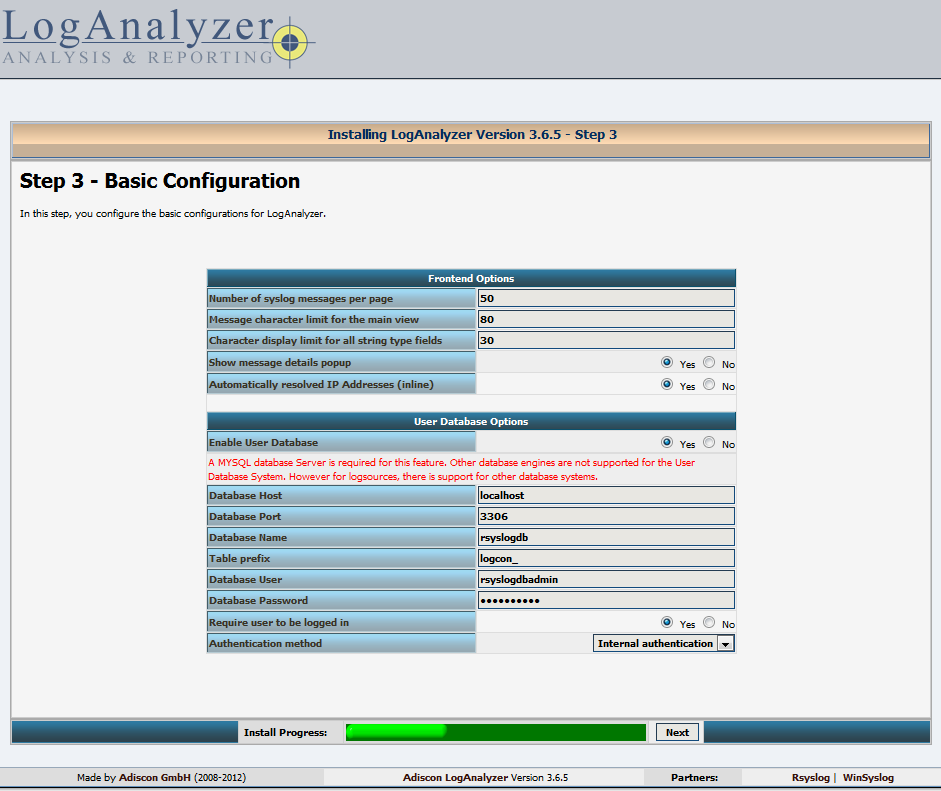
- In the Basic Configuration use the following image below to reference your installation.
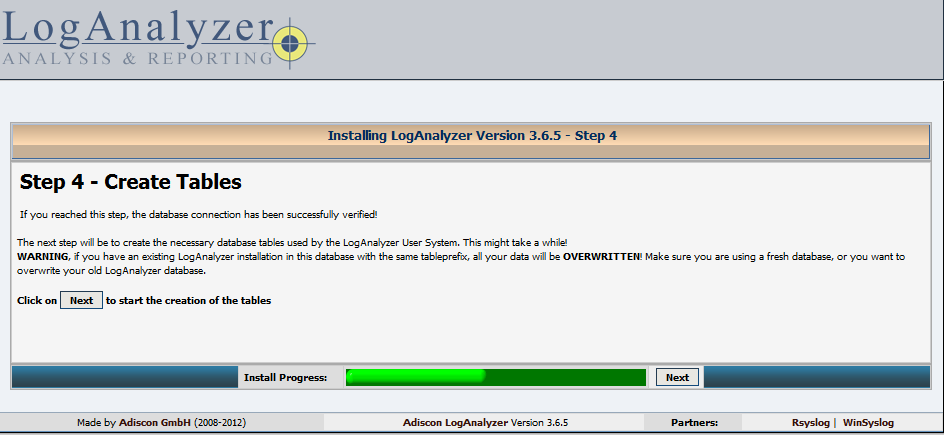
- The next page is to create tables in the MySQL database go ahead and select next.
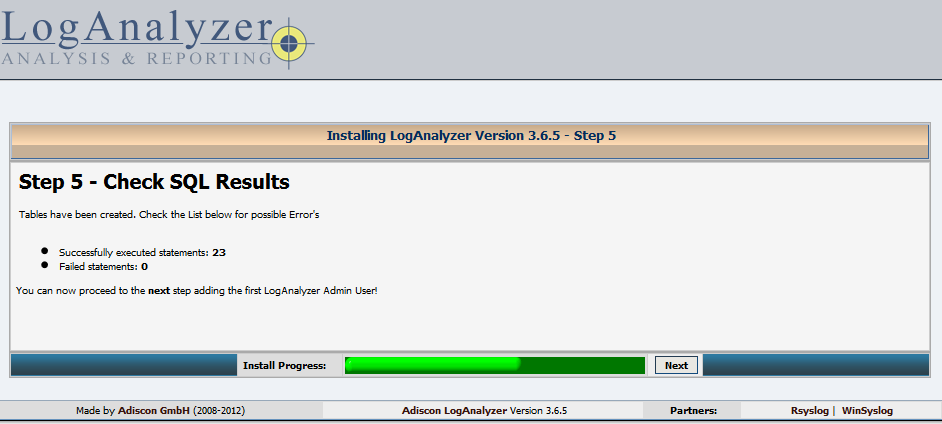
- The next page displays any errors if any SQL Results failed, select next if you don't have any failed statements.
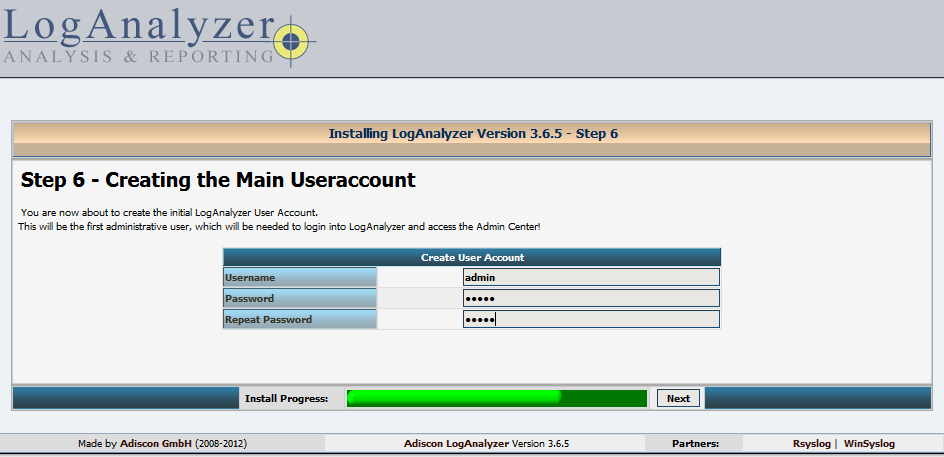
- In step 6 we create a main user account to log into the LogAnalyzer web app.
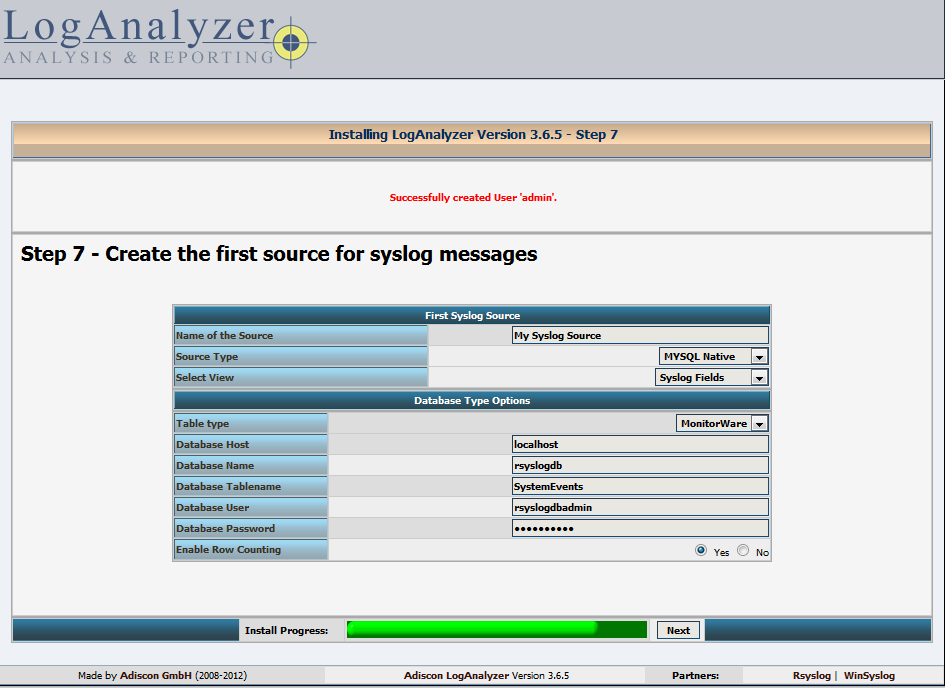
- In step 7, we create our source for syslog messages, follow the image below for a reference.
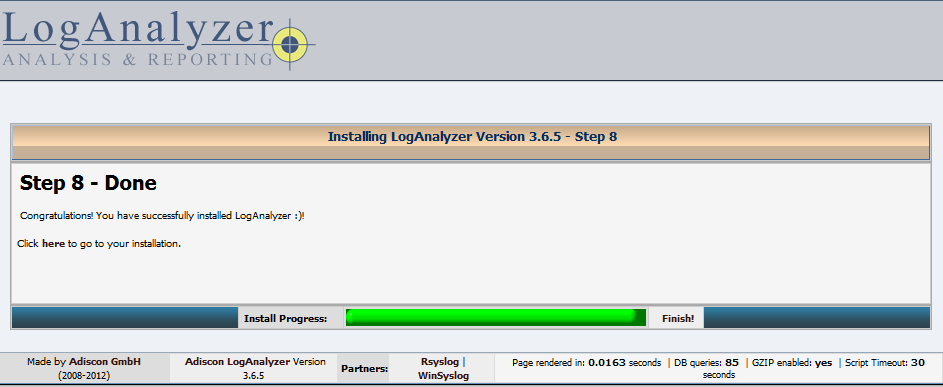
- Looks like we are done the select the "here" link to go to the login page.

Done! Some last things to check with LogAnalyzer is it does DNS lookups of IP address which can slow down the website if you have a lot of IPs in your logs. To disable that feature go to Admin Center ->Uncheck Resolve IP Addresses using DNS.
I have personally pushed up to 500 syslog messages every 10 seconds thanks to the Kiwi Syslog Generator and did not see any performance hits other than the DNS issue. Hope this information is helpful, let me know if you have used LogAnalyzer in a production environment, are there any gotchas? I have just been testing it on my lab and so far so good.
Links: CentOS MySQL RSYSLOG LogAnalyzer
Static Comments:
Nice!!
Ryan -
Glad it worked out.
wim -
thanks!!! tried several howto's for Centos with loganalizer....this is the only one works for me
Ryan -
Hey Frank, Sorry for the late reply, in this install doc I'm using Centos 6.5. I know things have changed between Centos 6.5 and 7 so what might work with Centos 6.5 may need some tweaking in Centos 7. I have personally not tested Loganalyzer on Centos 7, I would guess it works but that is only a guess. I would also use the latest stable software versions that are available for LogAnalyzer and RSYSLOG. This looks to be a permission issue with apache, I would verify apache has rights to write the config.php file. Hope that Helps, Ryan
HI Frank, I had same issue. I have followed the guide, of course, modified it to our needs. We have an issue on CentOS7 because of SElinux. Here is what i did: chown apache:apache -R /var/www/html/loganalyzer/ cd /var/www/html/loganalyzer/ find . -type f -exec chmod 0644 {} \; find . -type d -exec chmod 0755 {} \; chcon -t httpd_sys_content_t /var/www/html/loganalyzer -R chcon -t httpd_sys_rw_content_t /var/www/html/loganalyzer -R In my case I allowed to Apache write permission for full folder.
Here is detailed description about each step. http://blog.lysender.com/2015/07/centos-7-selinux-php-apache-cannot-writeaccess-file-no-matter-what/
Frank -
Hi! First congrats to this manual, it is really nice. BUT I'm facing a little problem (BUG???)on CentOS 7. Everything works, I use the same versions but after I execute the configure.sh, and open the loganalyzer gui, the second step fails with: "file './config.php'" is not writable. I made chmod 666/777 apache restart, selinux disable, but nothing happens. It keep says, that the file is not writable. Actually the file is: -rw-rw-rw-. 1 root root 0 30. Sep 19:33 config.php Could you please help me to finish this install? Thank you in advance and best regards