Laser Printing Process
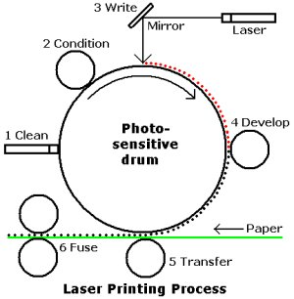
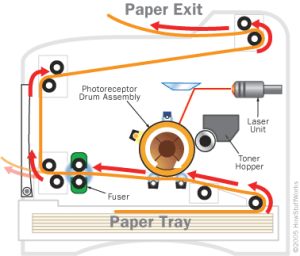
Let's move away from Cisco for at least a day, So this post will be talking about the six steps in the laser printing process, this is good for technicians who fix or repair printers along with a good learning experience. With my limited knowledge of printers I used this process to at least help diagnose the problem. If you have no idea how a printer works, I would not try to fix it. People have become hurt with these machines leave it to the professionals. Step 1: Cleaning When an image has been deposited on the paper and the drum has separated from the paper, any remaining toner must be removed from the drum. A printer may have a blade that scrapes all excess toner from the drum. Some printers use an AC voltage on a wire that removes the charge from the drum surface and allows the excess toner to fall away from the drum. The excess toner is stored in a used toner container that may be emptied or discarded. Step 2: Conditioning This step involves removing the old latent image from the drum and conditioning the drum for a new latent image. Conditioning is done by placing a special wire, grid, or roller that receives a negative charge of about – 600 volts DC uniformly across the surface of the drum. The charged wire or grid is called the primary corona. The roller is called a conditioning roller. 
Step 6: Fusing In this step, the toner is permanently fused to the paper. The printing paper is rolled between a heated roller and a pressure roller. As the paper moves through the heated roller and the pressure roller, the loose toner is melted and fused with the fibers in the paper. The paper is then moved to the output tray as a printed page. That's the laser printer process! If you took anything from this you should now at least know the steps of how a laser printer works and that could be a topic starter!
